OBS is free and open-source software for video recording and live streaming. You can use either your PC’s embedded camera or externally connected one as a video source with OBS. Sound sources also can also be configured with it.
Step 1: Getting the OBS:
Download via its official web page. It has Windows, Mac, and Linux releases.
Step 2 : Provide Sources:
By default, OBS starts to capture from your embedded camera if exists. You can add or remove video/audio source from Sources section, such as an image can be broadcasted as a video source or external microphone can be added as a audio source.
Step 3: Configure Stream Settings
Click “Settings” then select “Stream” tab. For stream type select Custom Streaming Server then you'll see the URL and Stream Key fields. If you don't already have your URL and Stream Key you can get it in the admin area of your site at sermons > live streaming. Copy and paste the url and stream key into OBS. Click ok to close the settings.


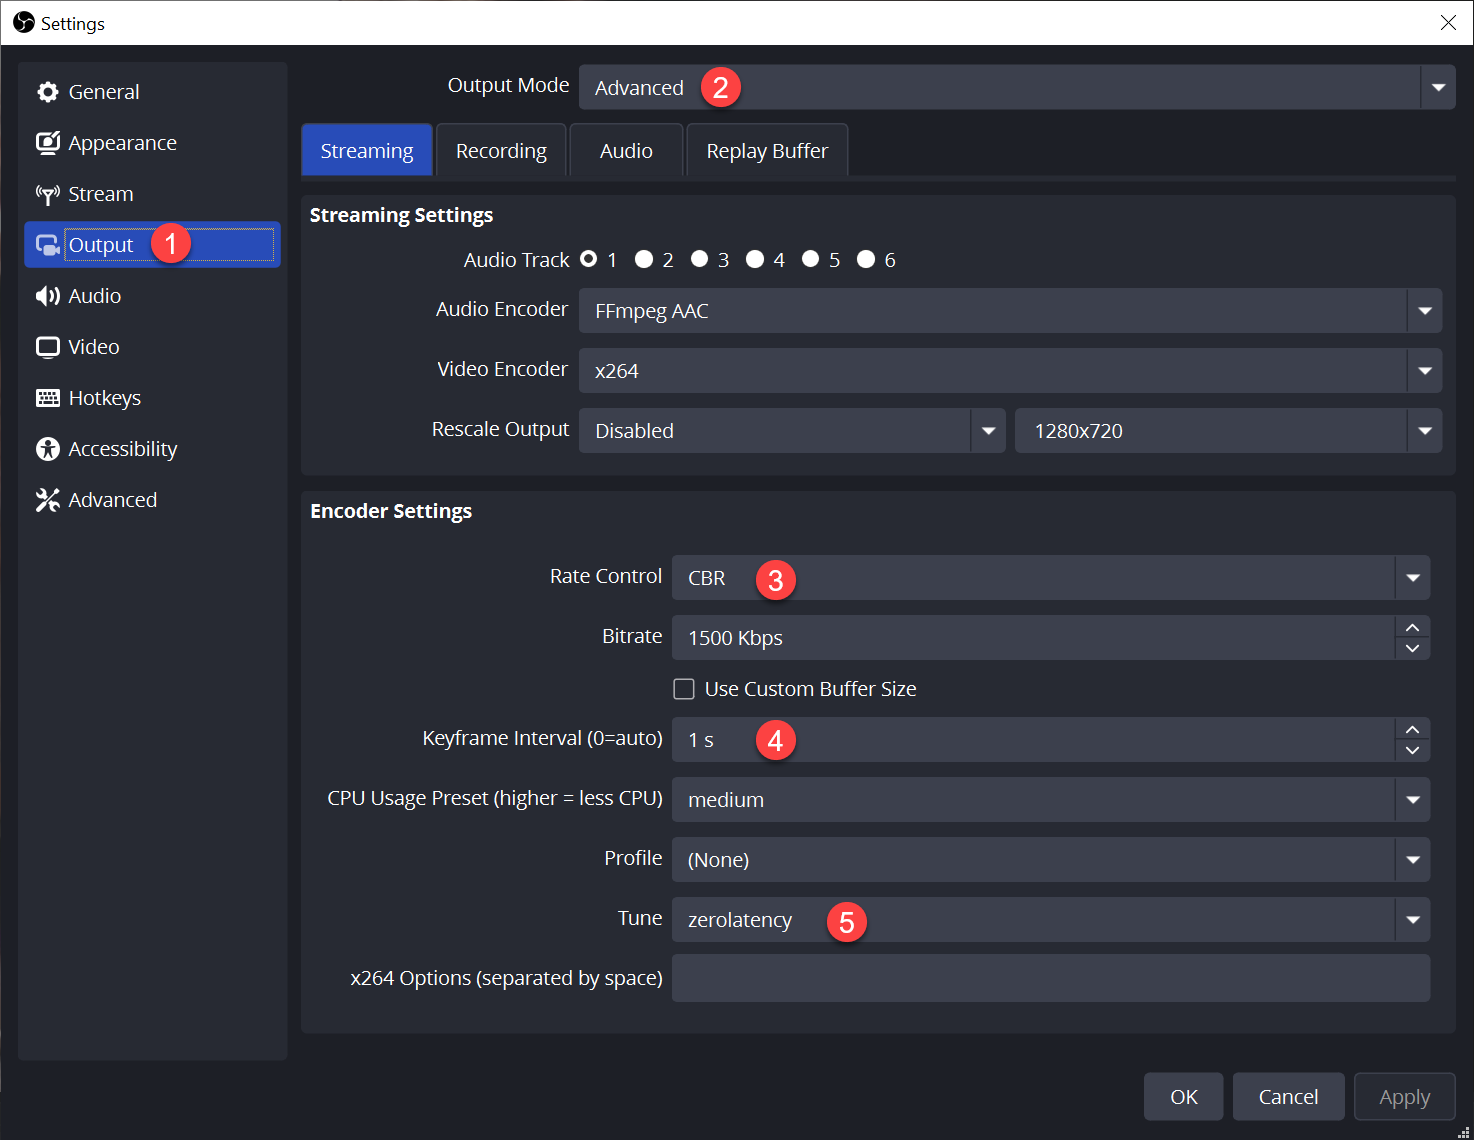
Step 3: Configure Output Settings
- Click the "Output" tab.
- Choose advanced at the top.
- Set Rate Control to CBR
- Set Keyframe Interval to 1s
- Set Tune to zerolatency
Step 4: Start Streaming
In OBS at the bottom right you'll see start streaming. Click that and you should be live on your website. While you are streaming you'll see the stream health at the bottom. To stop streaming click stop streaming.


Troubleshooting and Stream Health
Stream health parameters are located at the bottom right. There are 3 stream health parameters: Dropped Frames, CPU and Stream health color.
- Dropped frames: This value should be 0. If it increases, decrease your FPS or bitrate parameters in OBS settings.
- CPU: CPU value is important for streaming quality. We recommend that it never exceeds 70%.
- Stream health color: This color should be green. If it has a color between yellow and red you may have problems with your stream quality.

 Add your logo in the admin